Cosmic Cuisine: Loki’s Key Lime Pie Cheesecake Variant

On the sacred timeline, Loki and Mobius share some key lime pie while Mobius calms down after questioning a suspect. But we’ve already made a key lime pie (She-Hulk’s smashing no-bake key lime pie) so in the spirit of the TVA, here’s a variant from another timeline: key lime cheesecake! All in honor of Loki’s return to Disney+ with all his glorious purpose!
So continue on to see this Loki-inspired cheesecake variant of the TVA’s classic key lime pie!
Key Lime Pie Cheesecake Variant
On the sacred timeline Loki and Mobius share some key lime pie while Mobius calms down after questioning a suspect. But we’ve already made a key lime pie (She-Hulk’s smashing no bake key lime pie) so in the spirit of the TVA, here’s a variant from another timeline: key lime cheesecake! This has everything you love about key lime pie but in a cheesecake form, delicious!
Ingredients
Crust
- 11 graham cracker sheets
- 6 Tbsp butter
- 1/4 cup sugar
Filling
- 16 oz (2 bars) neufchatel cheese, softened
- 1 cup sugar
- 2 eggs
- 1/4 cup lime juice
- green food coloring
Toppings
- 1 cup heavy cream
- 1/4 cup powdered sugar
- 2 limes
- 1 cup sugar
- 1 cup water
- 2 Tbsp sugar
Instructions
- Preheat oven to 350°F.
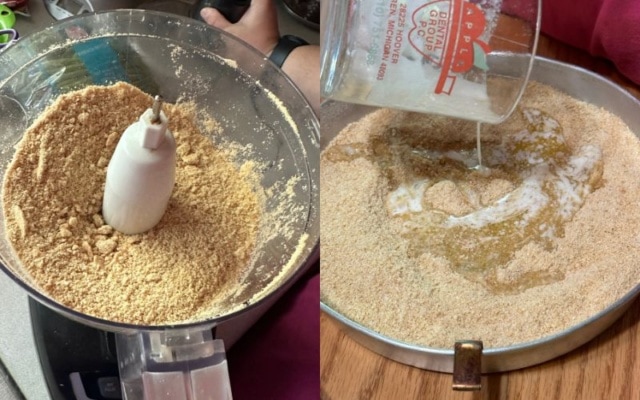
- Crush graham crackers into very fine crumbs.
- Mix graham cracker crumbs and sugar in a 9 inch pie pan. Melt 6 Tbsp of butter and add to the pan. Stir until well mixed.
- Flatten crust until even. Press crust up the sides of pan as well.
- Bake for 10 minutes.
- Cool crust for 5 minutes. Leave oven on while cooling.
- In a medium bowl, beat 1 cup sugar, softened neufchatel cheese, and lime juice until creamy.
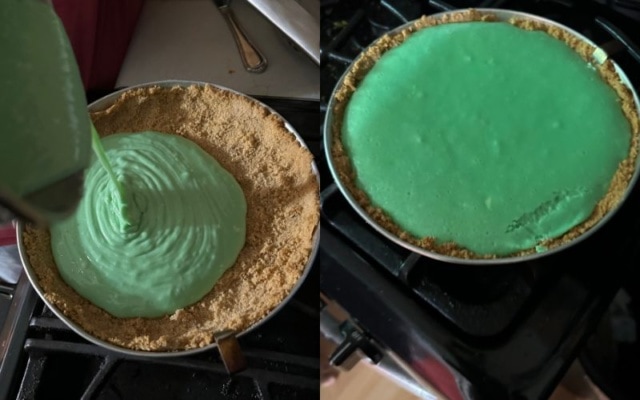
- Add eggs and green food coloring beat until smooth and creamy. You're going for a nice bright key lime green with the food coloring, just add a couple drops at a time until you like the color.
- Pour cheese filling into baked crust, even out the mixture.
- Bake 30-35 minutes at 350°F, until edges are just set and the center still slightly jiggles.
- Refrigerate until chilled, at least 4 hours.
- Meanwhile, prepare toppings.
- Slice limes into rounds. Cut rounds into semi-circles.
- Set up an ice bath.
- Bring water to a boil in a small sauce pan.
- Turn off heat and add lime slices, stirring gently until softened, about one minute.
- Immediately transfer slices to the ice bath.
- In a saucepan bring 1 cup water and 1 cup sugar to a boil, stirring gently.
- Reduce heat to medium- low. Add lime slices in a single layer and let cook until the limes are translucent, about 10-15 minutes.
- Transfer to a cooling rack and let sit for 1 hour.
- When cool, press slices into sugar until well coated. You may need additional sugar.
- About half an hour before serving, place your mixing bowl and mixer in your freezer for 15 to 20 minutes.
- Once chilled, pour heavy cream into the bowl. Slowly add powdered sugar while beating on high. Once you achieve stiff peaks stop (probably 5 minutes or less).
- Put whipped cream in a piping bag and pipe small mounds of whipped cream around the edge of the cheesecake.
- Top each whipped cream mound with a lime slice.
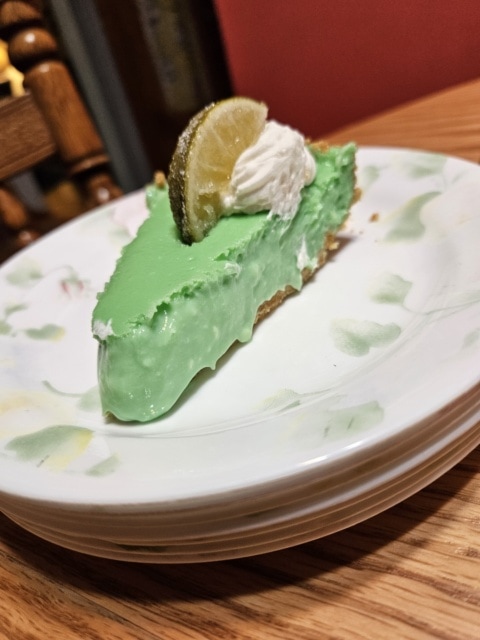
- Slice and enjoy!
Don’t be afraid to make this Loki-inspired treat!
So everyone is always super impressed when someone makes homemade cheesecake. Most recipes call for a bain marie (a pan of water that the cake sits in while it’s cooking) and that seems to really intimidate a lot of people. But this recipe doesn’t need one so that obstacle is gone. Of course, you don’t have to tell anyone how easy it is, just bask in the glory!
Making the crust of this key lime pie cheesecake
By far the easiest way to make graham cracker crumbs is to buy them (yes you can buy graham cracker crumbs, they come in a box, I’ve seen them). But I never do that. It’s far cheaper to make the crumbs myself and it isn’t really hard at all. Usually, I just put them in my food processor and pulse them into crumbs within seconds. But when my kids are helping out I put them in a gallon-size Ziploc bag and let them have at. Sometimes they use my meat tenderizer, and sometimes they use a rolling pin, but in the end, I have crumbs and they have fun, and that’s all that matters.
Now you’ll notice that in the recipe I told you to just make the crust directly in the pie pan. This is how I always make graham cracker crust. You can mix everything in a bowl first and then put it in the pan if you want, but that just makes more dishes. I can’t see how it impacts the crust whatsoever to just mix it in the pan, it just saves time and effort and who doesn’t like that? But if you want to wash more dishes, by all means, mix your crust in a bowl and then press it into the pie pan.
Guest starring: Neufchâtel, a cream cheese variant
You probably also noticed that my cheesecake doesn’t use that cheesecake staple, cream cheese. Instead, I use Neufchâtel cheese. It is very similar to cream cheese but it has ⅓ less fat per ounce which comes out to 30 fewer calories an ounce. It doesn’t sound like much but when you’re using 16 ounces that removes a lot of calories and every little bit helps. If you can’t find Neufchâtel or you just prefer to stick to what you know then by all means use cream cheese. It’s a 1:1 ratio and doesn’t change anything about the recipe.
Loki’s key lime pie cheesecake variant needs time to chill
Like a lot of time. This is not something that you eat fresh out of the oven. I usually make it the day before and leave it covered in the fridge until I’m ready to serve it. The limes can also be done ahead of time and kept in the fridge or freezer. Then I just do up the whipped cream and top it right before I need it. I haven’t yet experimented with freezing this cheesecake but I imagine it would be okay as long as you gave it plenty of time to thaw in the fridge before serving. And I would still make the whipped cream up fresh, even if I did freeze the cake.
Speaking of fresh whipped cream. If you are looking for convenience, I won’t tell anyone if you use canned whipped cream. But it really isn’t that hard to make it yourself. And the really nice thing is that you can adjust the flavor of the whipped cream to your needs. Maybe you want something sweet to offset some tangy citrus or maybe you want a nice peppermint flavor for the top of hot cocoa. The possibilities are basically limitless and it’s fun to experiment.
It’s all about the temperature
Getting that light, smooth, and creamy cheesecake texture is all about the right temperatures at the right time. Before you mix up your filling, take all your ingredients out of the fridge and give them time to warm up. Having everything at room temperature will help things blend together nicely, giving the cake a smooth texture without lumps and bumps.
When you’re baking the cake, don’t peek! Opening the oven door releases heat and keeps the cake from baking properly. This applies to all baked goods, by the way, keep that door shut! Of course, if you have a glass window and an oven light you can peek all you want, through the window!
A really important thing to remember is carryover cooking. When things come out of the oven they’re still holding a lot of heat (that’s why we burn ourselves when we steal cookies). This heat continues to cook the food after it comes out of the oven. Hence the term carryover cooking. So even if the cheesecake doesn’t look quite done, if the edges are set take it out when the timer goes off.
Finally, make sure to chill the cake completely. The cooling process is just as important for creating that creamy texture as not overbaking it is. Just have patience. I know it’s hard but it’s worth it. Chilling goes for the whipped cream as well. It might seem odd to place your bowl and mixer in the freezer but it’s necessary to really make whipped cream. You can eventually make it without the chill but it takes way longer and never seems quite as good.
Save the leftovers for your weekly Loki viewing parties!
You will have leftover whipped cream, a lot of it. Don’t throw this out! Save it in the freezer. It becomes like ice cream and makes a nice treat when you’re craving something sweet. I actually topped some that I had frozen with a sprinkle of cinnamon and sugar a couple of weeks ago when I had a sweet attack and it was delicious. I’ve also topped it with hot fudge, fresh fruit, sprinkles, caramel, chopped nuts, crushed peppermint, and more in the past depending on my mood. Basically, just treat it like ice cream. But don’t waste it!
Now that you have all the facts about this key lime pie variant, you can whip one up before the next episode of Loki! After you taste it I’m sure you’ll agree that some variants are worth keeping. Loki airs weekly on Thursdays only on Disney+! Let us know on social media @mycosmiccircus or in The Cosmic Circus Discord if you plan on trying out this recipe!
Cosmic Cuisine: She-Hulk’s Smashing No-Bake Key Lime Pie
Loki Season 2 Review: High Stakes and Multiversal Shenanigans
Cosmic Circle Ep. 43: Loki Season 2 Premiere Discussion (Spoilers)