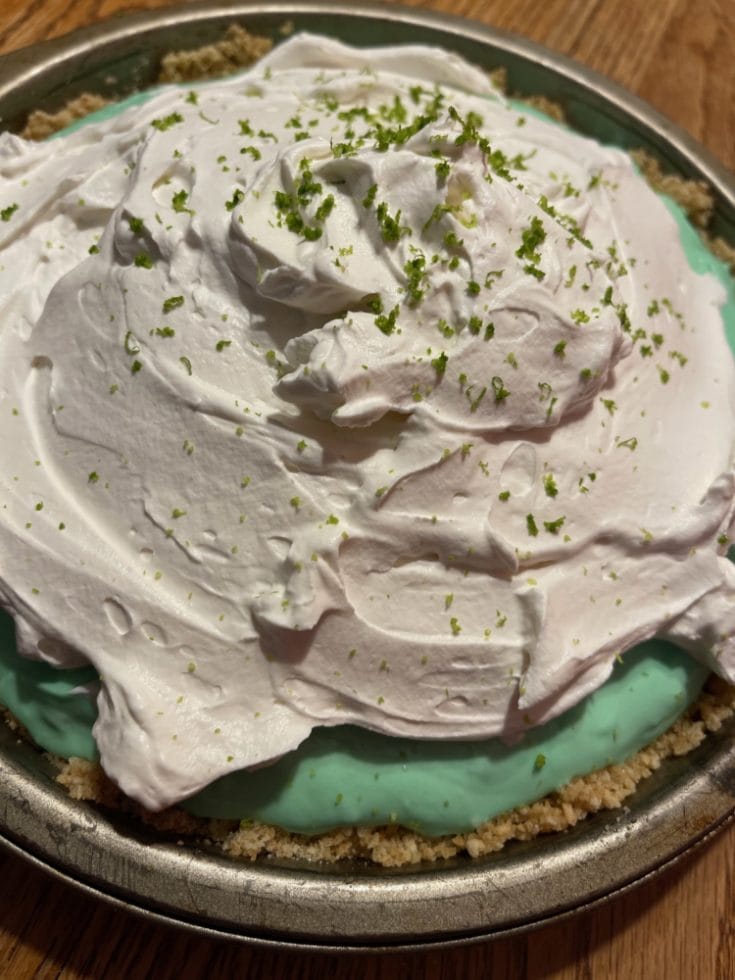
She-Hulk’s Smashing No-Bake Key-Lime Pie

Who else is excited that we’re finally entering our first ever She-Hulk era in the MCU? From the moment they announced this Marvel Studios project was in development, I was ecstatic to have one of my personal favorite heroes finally getting her time to shine on Disney+! So while anger and fear may be the triggers for transforming into our large green friends, The Cosmic Circus has the perfect way to keep your cool, with She-Hulk’s Smashing No-Bake Key-Lime Pie!
So let’s chill out with this tangy no-bake treat inspired by She-Hulk, perfect for any time you’re feeling hangry! Because you’ll like this when you’re angry!
She-Hulk’s Smashing No-bake Key-lime Pie
I wanted to commemorate She-Hulk: Attorney at Law, the newest Marvel Studios Disney+ show with a great recipe. Something sweet but a little tangy too, just like Jen. And of course something green for a little humor on my part!
I arrived at the perfect treat, a key-lime pie! However, we were in the middle of a heat wave and I was visiting my mom, so anything with an oven was a no-go. If you want to see She-Hulk, try turning on my mom’s oven when the thermometer is over 75℉. So what’s a girl to do? Then it hit me, a no-bake pie! And so She-Hulk’s smashing, no-bake key-lime pie was born.
She-Hulk’s Smashing No-Bake Key-Lime Pie

To celebrate the arrival of She-Hulk: Attorney at Law, the newest Marvel Studios show on Disney+, The Cosmic Cuisine is proud to present She-Hulk's Smashing No-Bake Key-Lime Pie! A sweet treat with a green twist that is perfect for Jennifer Walters and her friends! So join in the fun and bake one of your own!
Ingredients
Crust
- 2 Cups Crushed Graham Crackers
- 2 Tbsp Sugar
- 1 Stick Butter
Filling
- 8 oz cream cheese, softened
- 1 Cup Heavy Cream
- 1 Can Sweetened Condensed Milk
- 1/2 Cup Key Lime Juice
- Zest of Two Limes
- Green Food Coloring
Topping
- 1 Cup Heavy Cream
- 3 Tbsp Powdered Sugar
- 1 Tsp Vanilla
- Lime Zest Sprinkled on Top
Instructions
- We have to begin by assembling the crust. Crush or grind the graham crackers up. For this step, I use a food processor to achieve a consistent crust.
- Once crushed, mix in a stick of melted butter along with the sugar. Mix until thoroughly combined
- Press crust into pie pan and set aside in the fridge. Chilling allows the butter time to resolidify and achieve a crisper crust.
- In a bowl, beat together the softened cream cheese until smooth. Add in the sweetened condensed milk, lime juice, zest, and green food coloring (to the desired color). Continue whisking
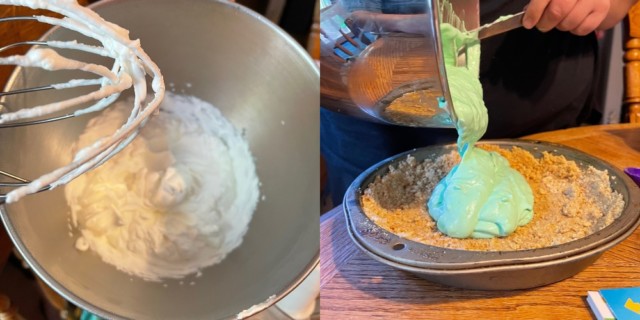
- In a frozen mixing bowl and whisk, add your cup of heavy cream to the bowl. Whip at high speed until the stiff peaks form.
- Fold the whipped heavy cream into the lime mixture.
- Once fully incorporated, pour the filling into the pie crust. Set into the fridge for at least three hours or longer
- Chill bowl and whisk again for at least 20 minutes. Add a cup of heavy whipping cream and a teaspoon of vanilla to the bowl. Start mixing at high speed. Add one tablespoon at a time of powdered sugar to the bowl. Mix to stiff peaks.
- Once the pie filling is set and firm, add the whipped cream as a topper. Zest a lime over top for garnish
Notes
- When making the whipped cream, it's essential to make sure the whisk and bowl are frozen, otherwise, it won't set up properly.
- If the filling is too tart, you can add slightly more sugar to reduce the pucker, however, you want to avoid adding too much, for it'll make the filling too sweet.
The first step for a no-bake pie is a graham cracker crust. I know many people say to push the crust out with a cup, spoon, or fork, but I always find that my hands work best. The graham cracker mixture always ends up sticking to whatever you use to push it out. Usually, holes are opened up and need fixing, which always ends up with me using my hands. And my least favorite part, extra dirty dishes. It just is easier and faster for me to use my hands right from the get-go.
If you forget to get your cream cheese out early enough to soften it, don’t despair! I often soften my cream cheese in the microwave. Just place the block of cheese in a microwave-safe bowl and place it in the microwave for 30-second spurts, checking it each time. It will likely make a whole bunch of farting noises by the time you’re done, don’t be scared, it’s just the fats and air inside the cheese heating up. Be careful not to over-cook it because it will burn. It should be fine if you stick to 30-second intervals for an 8-ounce block.
Other tidbits for creating a smashing pie
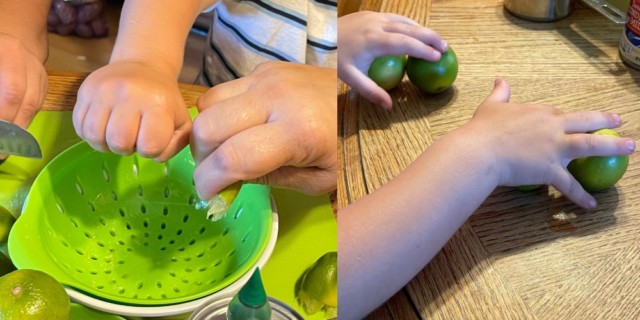
Juicing citrus can be an interesting experience. Sometimes you get so much juice you wonder how it all fits in the fruit and sometimes you can’t get anything out! There are a few tips that can help get more out of your fruit, especially with these tiny little key limes.
Pro-tip, zest the limes BEFORE you juice them. You can place the limes in the microwave for 10 to 15 seconds before juicing them. The key step for me though has always been rolling the limes. Roll the limes back and forth on a table or counter for a few minutes, making sure to push down hard on the limes. This softens them and almost pre-juices them so that when you put them on the juicer it’s much easier to get the juice out.

Make sure that all the bits of cream cheese are thoroughly blended into the lime mixture. It took me a bit of elbow grease, even after letting my stand mixer have at it for a while. Just keep smushing the small bits of cream cheese against the side of the bowl until the filling is completely smooth.
Making perfect whipped cream has two very important secrets that I am willing to share with you. That most important secret is COLD. Everything you’re using to make the whipped cream needs to be extremely cold. I usually use my stand mixer so I place the whisk and bowl into the freezer for a minimum of 15 minutes, but usually 20 to 30 or more. You can use a hand mixer and bowl too, just place them in the freezer for the same amount of time.
I do NOT recommend trying to make whipped cream without machine help because the second secret is SPEED. Use the fastest speed that your mixer is capable of and keep the speed going until the cream begins to look solid. Then stop and check your whipped cream.
Typical whipped cream should be able to hold a “peak”. That means when you pull the whisk out the little point left behind should stand all on its own. Of course, when making a dessert you can make it a little softer if that suits you. Just don’t over-whisk the cream or you will get butter!

Make sure to chill this pie for the whole three hours. Longer is better. Overnight is great and this pie was actually more amazing on day five than it was the first day! It held its shape even after being cut, with no side leakage like some pies will give you. The whipped cream also held up wonderfully. It lost some height but it didn’t separate, which was quite amazing. However, if you are not planning to serve the pie for a few days I would wait and make the whipped cream right before serving so it will look the best.
Final thoughts on this smashing She-Hulk pie
This pie was a blast to make, the recipe was fairly simple, and not having to turn on the oven was a huge plus! This pie’s superb balance of sweet and tart exemplifies Jennifer Walter’s in every aspect. As perfect as this is for She-Hulk, I know it’s going to be making a regular appearance at all my summer gatherings now. Somehow I don’t think Jen will mind!
She-Hulk: Attorney at Law is currently on Disney+, with new episodes weekly! And if you haven’t seen the latest from Cosmic Cuisine, check out our ode to the cutest tree in all the galaxy with our I Am Groot chocolate bark!


